
Please note that you would need to have the Base Plugin installed and configured in order for this extension to work.
Our Dokan Add on works on a per vendor basis. The configuration settings are also on per vendor basis. So to access the configuration settings:
- Login as a Dokan vendor user (user type should be “Vendor”)
- Go to Dokan dashboard. Usually it is: yourwebsite.com/dashboard
- Go to Settings – Intercom
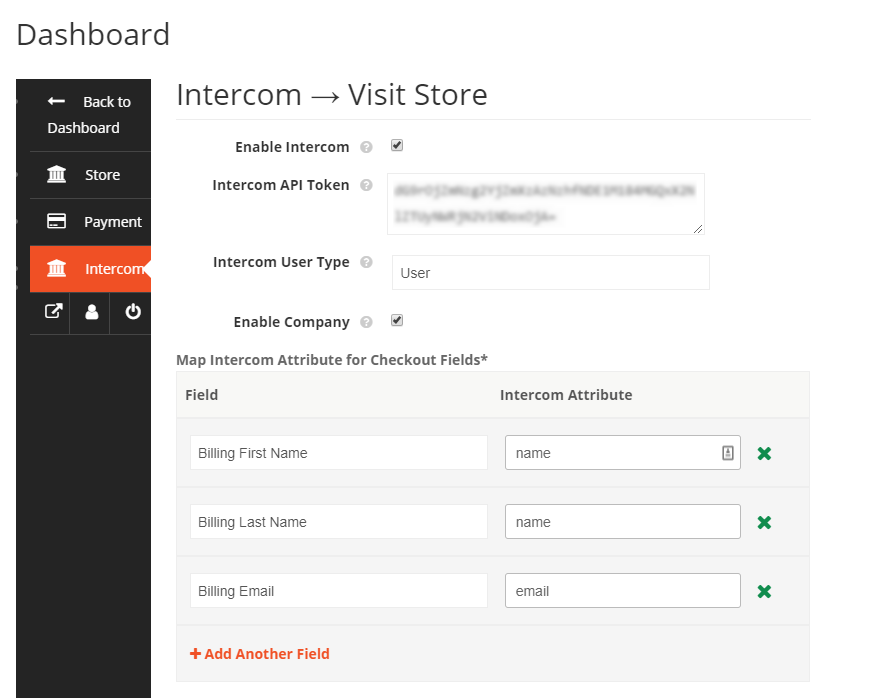
- Enable Intercom: Whether intercom add on should work or not for the vendor
- Intercom API Token: The token for vendor which should be used to subscribe users
- Intercom User Type: The vendor can choose whether to list the user as User or Lead. You see this page if not sure which one to choose. But most of the times choosing User is enough.
- Enable Company: The vendor can enable company integration with Intercom with this option. This is totally optional. If enabled, The Company name from the Checkout page will be registered as an Intercom Company and that company will be assigned to the newly created user. It makes it easier for you to group and manage your users.
- Map Intercom Attribute for Checkout Fields: The vendor can map specific data to be mapped to specific attribute in Intercom. On a basic setup, mapping Billing First Name to name and Billing Email to email is enough (as shown below).
- At last you can click Save Settings to save the settings.