
After Installing and Activating the plugin you would need to configure it. Without this, the plugin will not work, since it is based on MailChimp API and it requires an API Key to be present in order for it to work.
To configure, please follow these steps below:
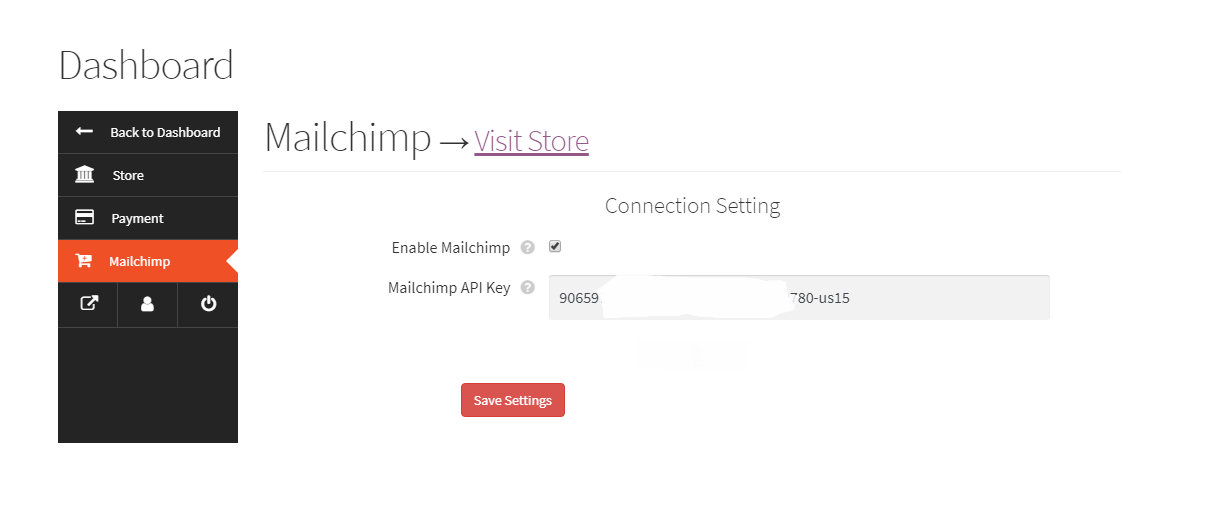
Step 1: Connection Settings
After you activated the plugin, you can go to the Vendor Dashboard than go to Settings => MailChimp menu and enter the Mailchimp API Key there and checked Enable Mailchimp than click the Save Settings button.
To get your MailChimp API key, go to https://us15.admin.mailchimp.com/account/api/ and then click Create a Key.
If you need more help about API Key, see here: https://mailchimp.com/help/about-api-keys/
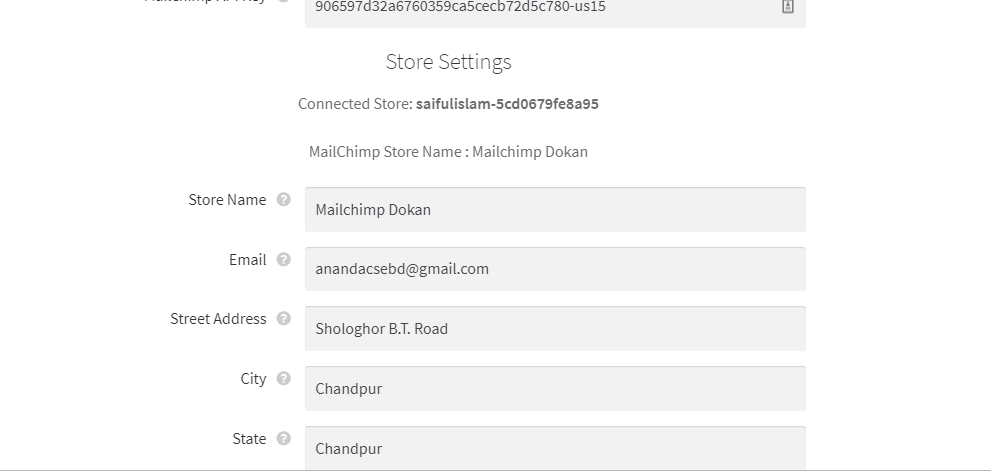
Step 2: Store Settings
After saving connection settings options new Store Settings options appearing. Fillup store settings options and click save settings.
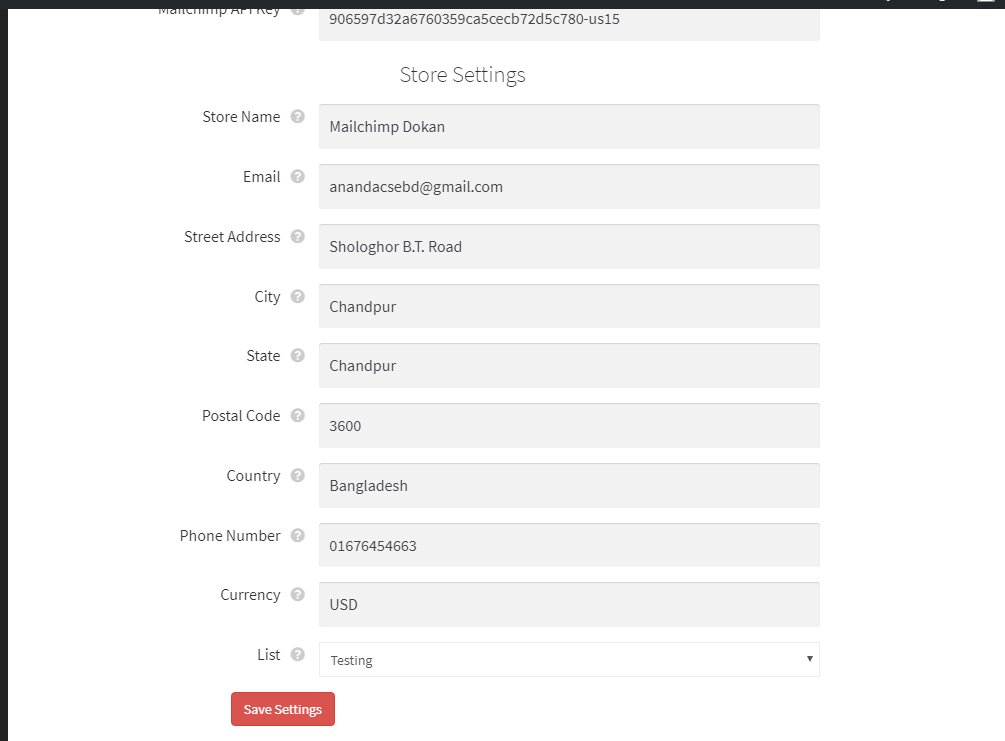
After saving store settings a store creates automatically in Mailchimp.

Step 3: Synchronize Settings
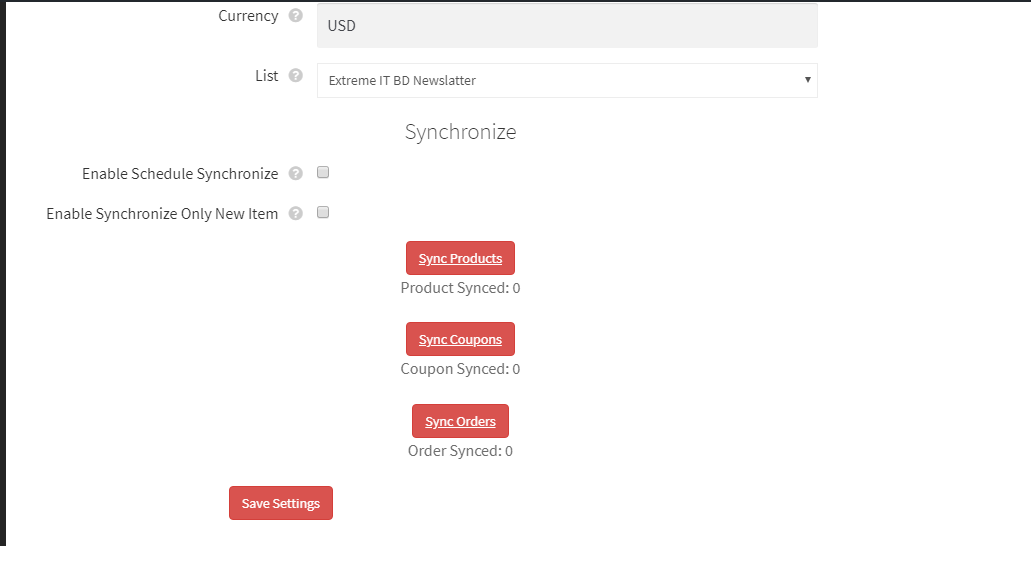
Vandor can enable Schedule Synchronize or Synchronize manually by clicking Sync Products, sync Coupons, and Sync Orders button. For enable Schedule Synchronize checked Enable Schedule Synchronize checkbox.
A vendor can set synchronize options only new items Synchronize or All items Synchronize. For only new items, synchronize checked the Enable Synchronize Only New Item checkbox.
You can help yourself or contact us for anything related to customization.