
After installing the plugin properly, you can concentrate on configuring it to your liking.
- Go to WP Admin – Intercom Subscription. You will find a field titled Tags.
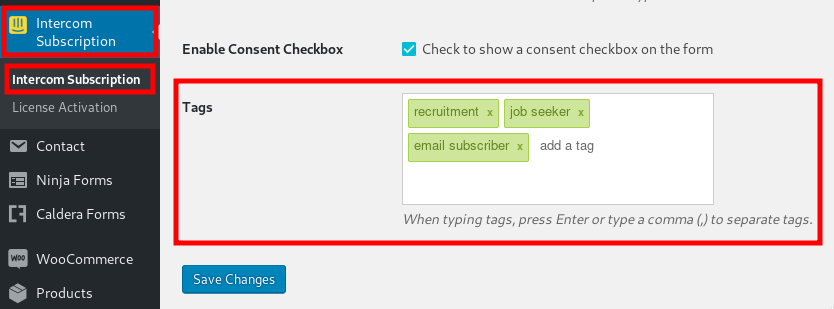
- Enter your custom tags on the field. You can further:
- Press either a comma (,) or Enter to separate tags.
- Press Backspace to delete the last entered tag.
- Click on the cross icon beside a tag to delete the specific tag.
- When done, click Save Changes at the bottom.
You should now be able to use the Tags feature and let your users get listed on Intercom with the tags you saved. It is recommended to test on the frontend like a user before you offer the form to users.