
After installing the plugin, now is a great time to configure it as you like.
- Go to WP Admin – Ninja Forms – Dashboard. You will see a list of Ninja Forms.
- Create a form if you haven’t already.
- Click on its title to go to the edit page.
- From the edit screen, click Advanced tab, then Intercom.
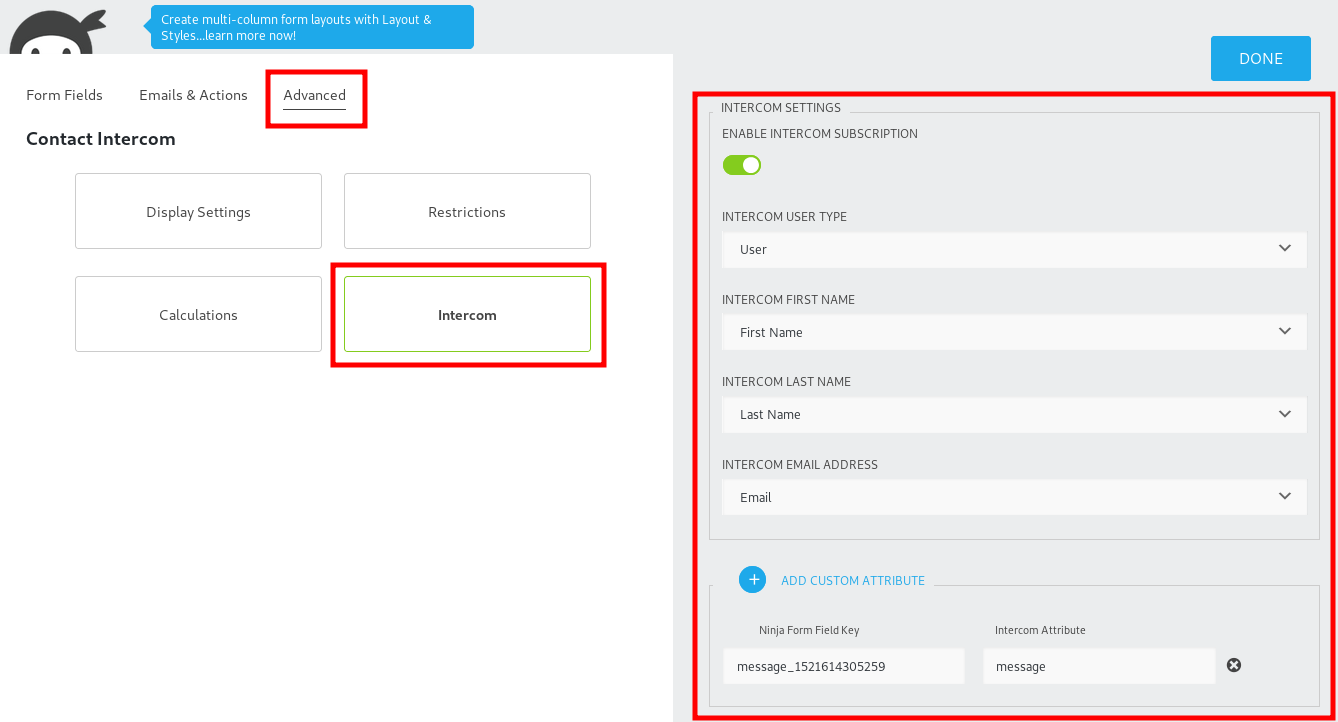
- You will see loads of options for your intercom integration. Don’t panic, they are all here to help you. Let’s go through the options one by one:
- Enable Intercom Subscription – Enable this to make the intercom addon plugin to work. If you need to temporarily disable the plugin, you can turn it off.
- Intercom User Type – The type which the new user should be of. Usually selecting User should be enough. If you know what is Lead and want to use it, then go ahead.
- First name, Last name and Email address – Click the arrow beside the field and choose which attribute you want to map with the field.
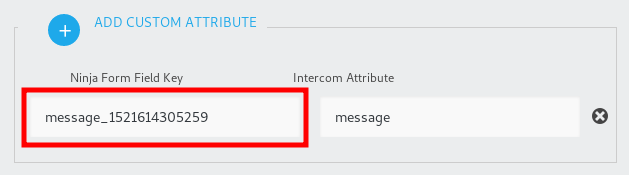
- Add Custom Attribute – You can add custom attribute in this section. For each one, you can put a field key and a Custom Attribute that you have on Intercom.
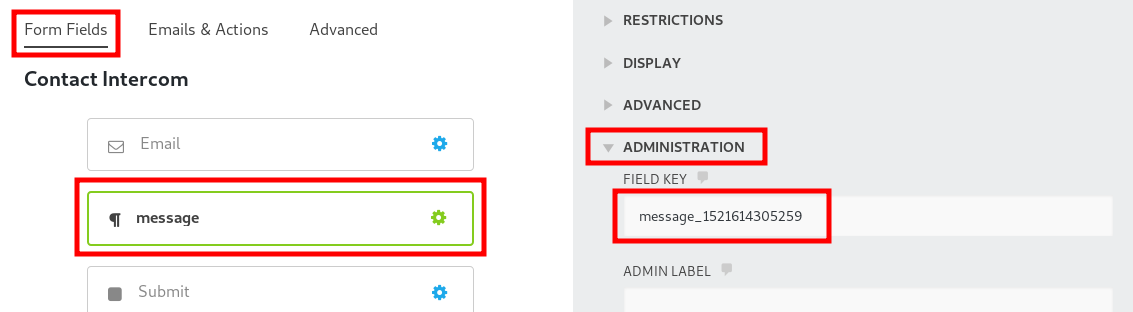
Note: To get the field key, go to Form Fields tab, select the field you want to map the custom attribute with, go to Administration section on the right and copy the Field Key. Then go back to Advanced tab again and paste the field key on Ninja Form Field Key field.
- Click Done and Publish the form after you have changed the settings.
- Copy the Shortcode for your form from WP Admin – Ninja Forms page and paste it on a page or post.
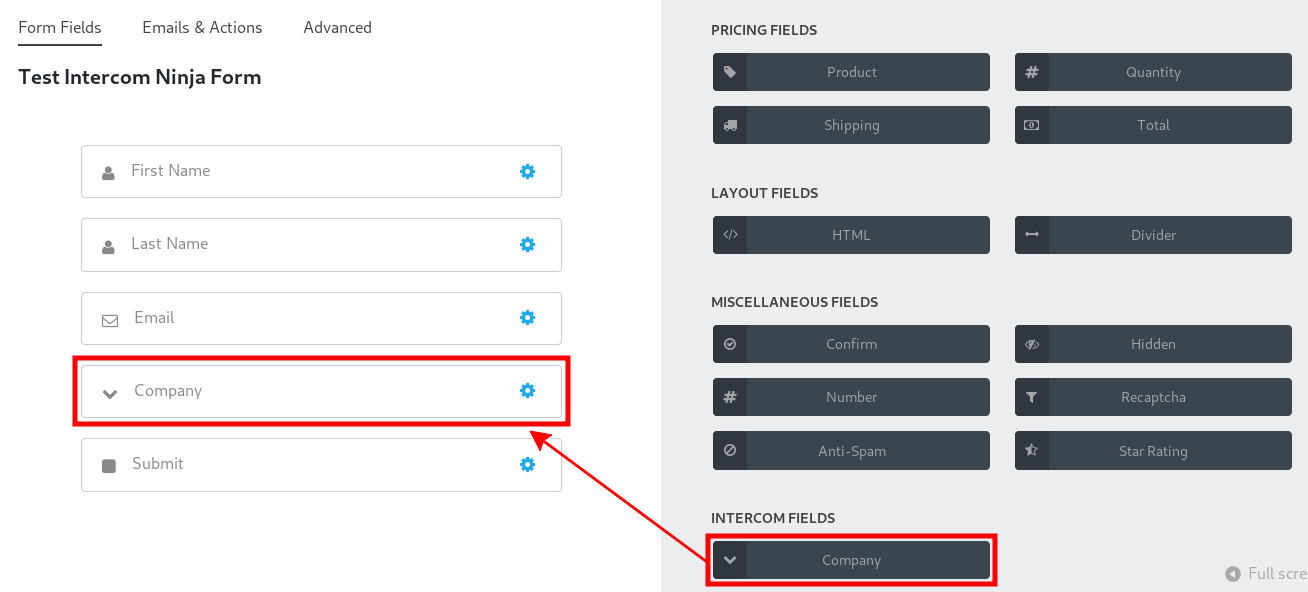
Company Integration with Intercom
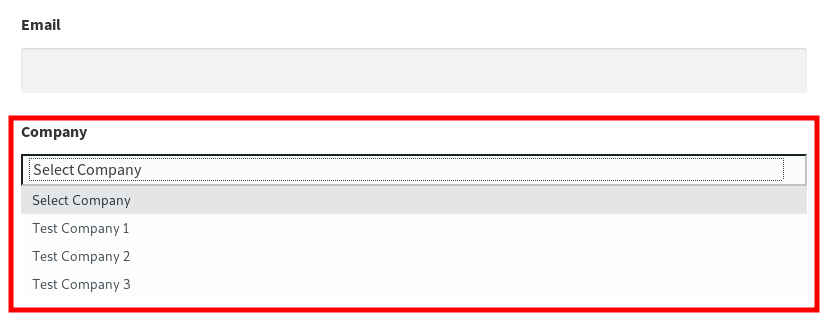
You can add a Company field that will show a drop down containing all the registered Companies in your Intercom account. When a user fills in the field, he will be listed under that company on your Intercom Dashboard. It makes it easier for you to group and manage your users.
This is totally optional and you may use this only if your website needs it. To add this field, just click the big plus icon to the right, then drag and drop the Company item from the list on the right to where you want this to be placed on the form.
You can either set this field as required or not required, by clicking on the field. It will have an option on sidebar to the right.
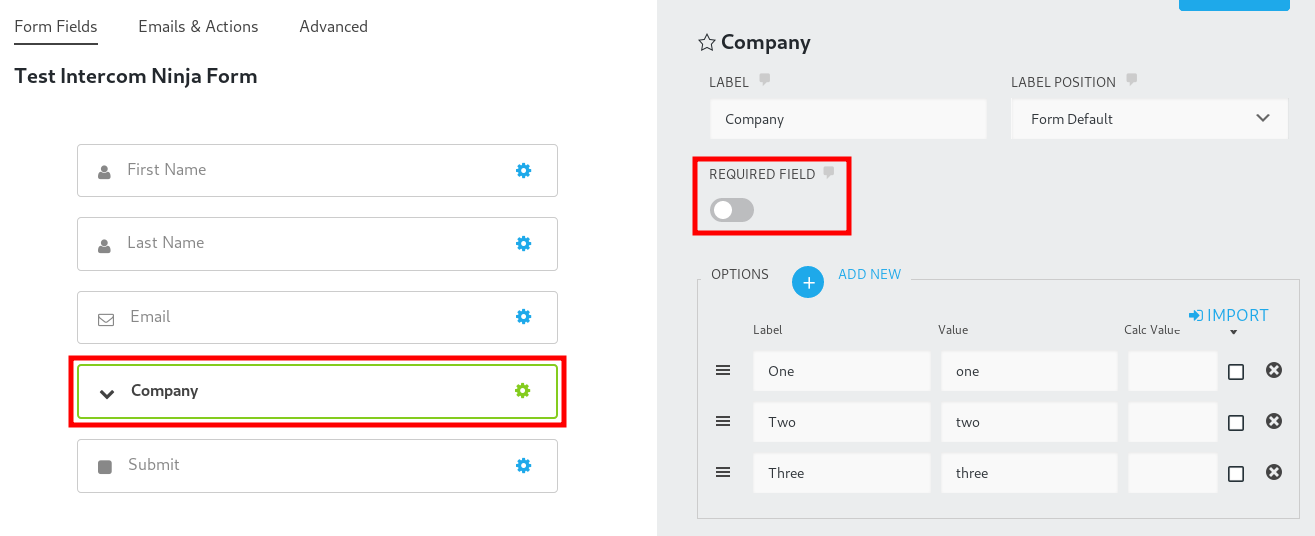
Note: Some options defined under Options field on the right sidebar may appear as default. They will not affect the field and will be ignored when the Company field is shown on frontend.
After you made your changes, click Done, then Publish.
For your users on the frontend, it will display a field similar to this:
You should now be able to use the Ninja Forms form and let your users get listed on Intercom. It is recommended to test on the frontend like a user before you offer the form to users.